Friday, May 5, 2017

Week 12-Half of deck

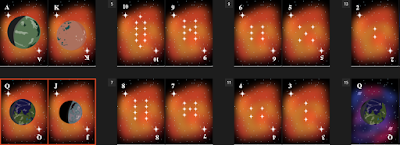
This week we had to have the first half of the deck completed. For me that meant 27 cards since poker decks have 52 cards and I added 2 jokers. This half includes the star and planet suits. I created these by placing the images into Adobe InDesign and creating a master page for each suit. Then I add the images to each card. For the face cards I placed each single image on the cards. For the number cards I copy and pasted the suit image to match the number for each card. I used Shift+Command+Click to change the numbers and letters for each card from the master page. These are the resulting cards.

Week 11- Cards Variations(Part 2)

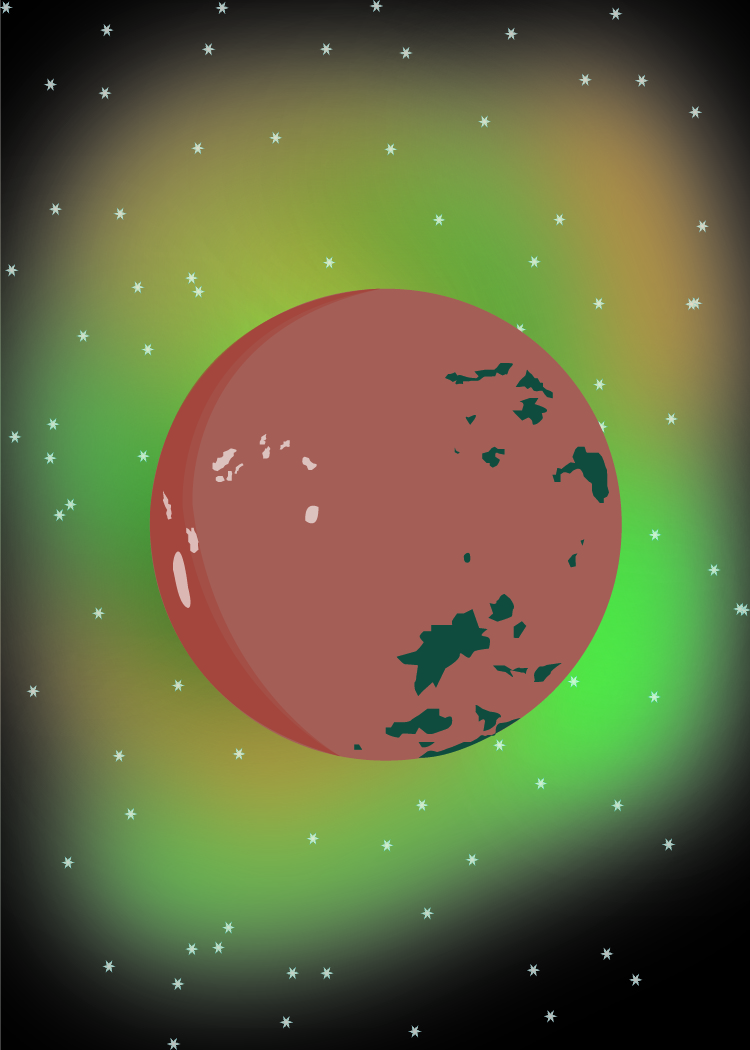
This week we were tasked to create another 3 images with 3 variations of each. After some consideration I decided to redo the direction I was going in and instead decided to do cards inspired by various planets that are from Star Trek. For the cards below I used Vulcan, Romulus, and Qo’nos as inspiration. These were the results.
Vulcan 1


Vulcan 2

Vulcan 3

Qo'nos 1

Qo'nos 2

Qo'nos 3

Earth 1

Earth 2

Earth 3
I created each one starting off with a black background that I then used the brush tool  to create random overlapping spots of color. I then used the Gaussian blur effect on the colors to create a blurred galaxy look. I then used the symbol sprayer and one of the snowflake symbols to create the stairs. I also used the symbol sizer to make them smaller. I used this to create the 3 different backgrounds and just copied them for each card. For the images themselves I used the eclipse tool to create the basic shape and then i used the pen tool to roughly trace photos of each planet. I wanted the land and water on the planets to look more organic than just being photo accurate. Then I used black crescents of varying size and opacity to create a shadowed effect 


Week 9 - Card Research

For our final Project we are tasked with creating a deck of cards. We can either make a new game or use an existing game as long as the designs and art work are ours. For this week we had to do research on what card game we wanted to do. We had to find ten and then narrow down the what card game we wanted to do from there. These were the ten that I thought about doing.


Week 10- Card Design Variations

 This week we had to have 3 different card designs done with 3 variations of each. After deciding to do a poker deck with a space theme I used illustrator to create some cards. To create the cards in illustrator I used the symbol sprayer tool, the pen tool, the brush tool with the Gaussian blur effect for the background, and the gradient tool. These were the results.

Black hole 1

Black hole 2

Black hole 3

Saturn 1

Saturn 2

Saturn 3

Sun 1

Sun 2

Sun 3

Wednesday, March 1, 2017

Week 8- Logos

       For this week we did a continuation of last weeks logo project. The difference was that this week we focused on the logos that were assigned to us from outside the art department. We created 3 versions and 3 variations off of each one. The one that I focused on was the RJEA logo. 
       Each logo was created using Adobe Illustrator. I used the pen tool, the type tool, the ellipse tool, the rounded rectangle tool, and the polygon tool. I also used a variety of fonts that I found online and some that were already available. In the first 2 versions I used just the text and in the third one I used images related to the four words race, justice, education, and action. 


Version 1


 Version 2


 Version 3


     These next ones were my finalized variations of versions 1 and 2. Each one was revised based off of comments from my instructor and some of my own observations. For the circular logos I used type along a path to create text that evenly went around the circle. For the rectangular ones I used the rectangle tool and the shape builder tool to create a bar of another color that ran along the bottom that the text sat on top of.

Version 1


Version 2


Wednesday, February 22, 2017

Week 7- Logos

      This week we were tasked with creating a logo for two of the four projects. Two were requests from the school and two were for two pieces of equipment in the art department. The logos that I created were two for the RJEA and to for the saw that we named the "Piece Maker". I used adobe illustrator to create all of the logos.
       For the RJEA logo we had to use both the acronym and the words race, justice, education, and action in the logo. The shape of the logo was up to us so I decided to use a circle and a rounded rectangle to create a crisp design. The colors I used are our school colors since this would be an organization at our school.
This one was created using the ellipse tool and the pen tool to create the middle letters. The other letters were just altered from the alphabet that I created before.

For this one I used the rounded rectangle tool and just rearranged the letters from the previous logo.

      These next two were created for the hand saw that we got in the art department. The guidelines for the logo was that it had to say "Piece Maker" and it had to be a rounded rectangle. I chose the colors to kind of mimic the colors of the saw itself. I used the rounded rectangle tool and the pen tool to create both of these.

For this one, I created the letters using the pen tool to make them look like they were made up of different pieces.

For this one I used solid letters but included two puzzle pieces to play off of the word piece.

Wednesday, February 15, 2017

Week 6- logo Remixing

       For this weeks assignment, we were tasked with tracing 3 logos and creating 3 variations of each. I chose to do the Captain America's shield, the rolling stones logo, and the star fleet command insignia. Each one of them varied on how difficult they were to trace, the rolling stones logo being the hardest. However, the each pretty much used the same tools.
        To create the traces of the originals I worked in Adobe Illustrator and used the pen tool and the circle tool. I started with using the pen tool and tracing with just the stroke one, going back and forth between having the original image visible and invisible. Then after that I turned on the fill for each section and tried to match the color to the original image.
Captain America Shield 

Rolling Stones 

StarFleet Command 

For the variations, I used the pen tool and the brush tool to add or change different parts of the image. I also changed the color for most of the images. 
Botany Division-StarFleet Remix 1

  Beauty Division-StarFleet Remix 2
Food Division- StarFleet Remix 3

Vampire- Rolling Stones Remix 1
Popsicle- Rolling Stones Remix 2

Check up- Rolling Stones Remix 3

Captain Planet- Captain America Shield Remix 1

Captain Capitalist- Captain America Shield Remix 2 
Captain Ireland- Captain America Shield Remix 3